Custom variables are used in web link distributors to create unique links that can help you track each respondent or group of respondents. The variables can be viewed in reports and in data exports. For example, let’s say you’ve created an NPS survey to send to your company employees to gather feedback on how the company is doing. If you want to group the responses by employee category (marketing, sales, manufacturing, leadership), there are 3 ways you could do this.
- Include a multiple choice question, asking the survey respondent which group they work for.
- Create separate distributors for each group.
- Create custom variables
A web link with custom variables looks something like this:
https://www.surveyrock.com/ts/548141/company-nps?dept=[dept_value]&loc=[loc_value]&mgr=[mgr_value]
The custom variables are highlighted in green and the text in purple is the value that you would need to replace with your own values.
Create custom variables
The first step in creating custom variables is to go to your survey settings page and scroll down to the Miscellaneous section and click on the “Change” button under “Custom Variables”.

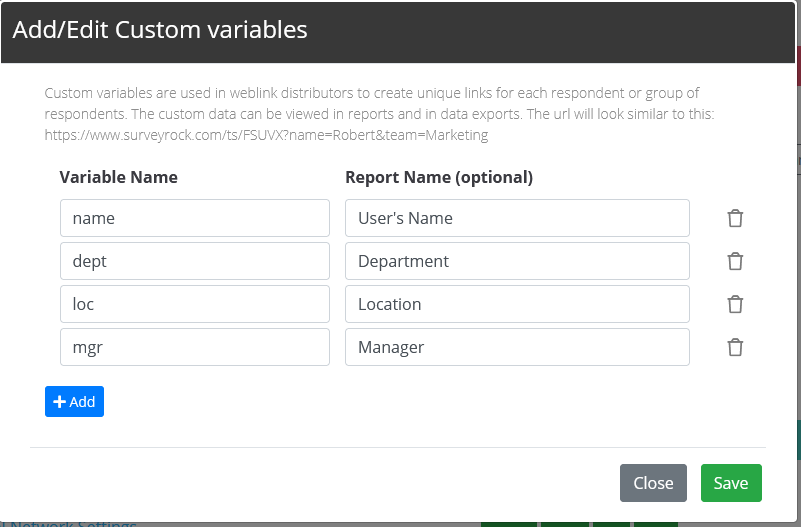
This will open the Add/Edit Custom Variables window. Enter the name of the custom variable on the left and optionally a Report Name on the right side. The Report Name, if used, will show up in data exports and the reporting page.

There are certain limitations to the variables because of how URLs are designed to work.
- The whole link/URL cannot be longer than 2000 characters. We recommend keeping the variable names short, especially if you include several of them to ensure that you stay below the 2000 character limit.
- The variable name may only contain letters, numbers, dashes or underscores. You cannot use the words “id” or “preview”.
You can create as many or as few custom variables as you want. When you’re done, click the “Save” button.
Web Link Distributor
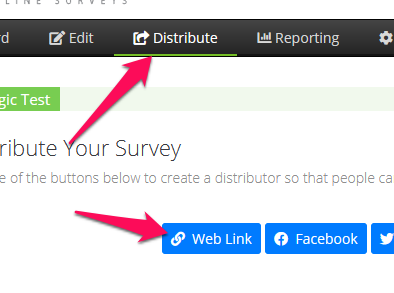
These variables can only be used together with Web Link distributors. Go to the Distribute page and create a Web Link Distributor.

When you’re done, the link will be show with the custom variable(s) you just added as well well as the portion that you’ll need to edit yourself.

Next we recommend that you edit the URL in a spreadsheet (Excel, Google Sheets, Numbers, etc.) and replace the text in brackets with the values you want to pass through the URL. Please note that custom variables are case sensitive. They need to match exactly what you entered in the earlier step on the Survey Settings page.
Finally, send each link to the person or group of people that you want to share the survey with. In our example from the top of this document, those links might look something like this:
https://www.surveyrock.com/ts/548141/company-nps?dept=marketing
https://www.surveyrock.com/ts/548141/company-nps?dept=sales
https://www.surveyrock.com/ts/548141/company-nps?dept=manuf
https://www.surveyrock.com/ts/548141/company-nps?dept=leadership
Custom Variable Reporting
There are a few different ways to see the variables in your reporting. When you go to the individual response page, any custom variables that were passed in the URL are displayed at the bottom. The custom variable name is on the left and the value is on the right.

If you’re using one of our paid plans, then you can also create filters to only display responses with specific variables.

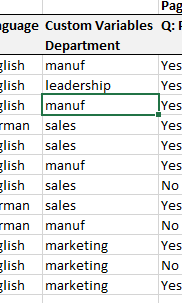
When you export the individual survey responses to a spreadsheet (available on paid account plans), those custom are shown for each respondent.

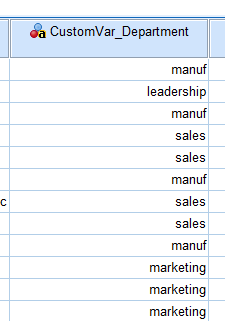
The same data is available when we export it to SPSS.

Using custom variables is a great way for you create categorize and group your survey respondents.
